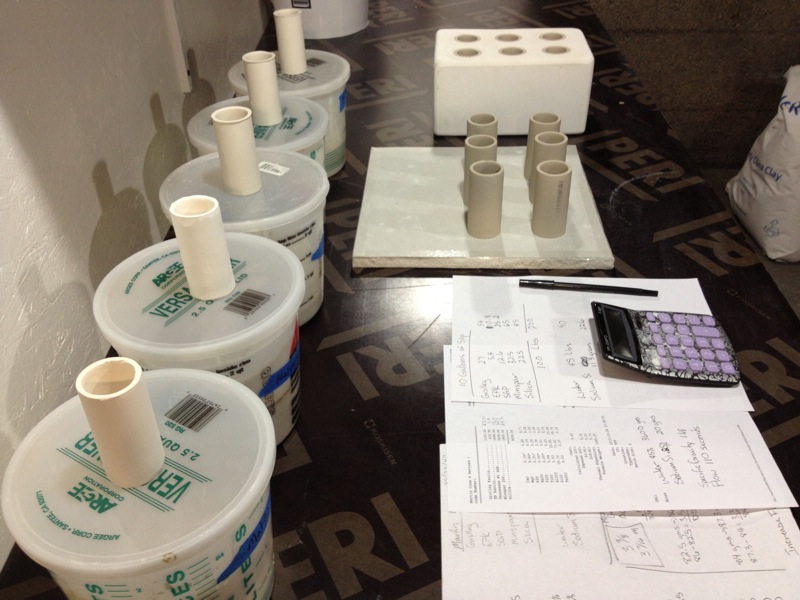
Clay Tests

I finally ran out of the clay I brought with me from Washington. I had about 25 gallons. Yes, I did put 25 gallons of liquid slip on the moving truck. The containers were tightly sealed but I was a little concerned that we would open the back of the truck to find slip everywhere. Fortunately, that was not the case. I knew I had orders to fill right away so I didn’t want to fuss with a new clay body with deadlines looming. In the meantime, I was testing new materials and recipes.
I don’t really think it’s necessary to make your own clay. There are plenty of clay suppliers all over the country that provide very good clay bodies for a variety of uses and temperature ranges. On the other hand, if you’re having problems with your clay body you can tweak it through a series of tests to fix the problem. Casting Slip is a little different. When it is available it can be pricey. I did pay for this convenience in Washington. The Clay Art Center in Tacoma, WA has an excellent casting slip called Grolleg Slip. It is a beautiful clay body with great casting properties.
But now that I’m in a new city I don’t want to pay to have that clay shipped to me. So I have decided to mix up my own casting slip. This is where I may get a little technical in ceramics information but I love the chemistry involved and want to share my process.
I thought it would be fun to mix up the raw clay materials, each into a separate slip consistency. I wanted to see how they “behaved” on their own. You can read all about this but seeing it first hand can really solidify your knowledge about materials. One of the clays was very brittle, one shrunk a considerable amount, one settled in the bucket, and a couple of them stayed in a jello like consistency. The ideal slip will not settle out nor will it gel in the bucket and by nature it is brittle but you want it to be plastic enough to not crack in the corners of a complicated mold.
Next, I mixed up a few slip recipes where the raw clay materials have been mixed in varying amounts. Sure enough I was able to see the roles each of the raw clays play in the different slips. Again one settled out, one stayed in a gelled state and would not cast much thicker than a millimeter in the mold, and one had just the properties I was looking for. Like Goldilocks I found the right recipe.
I still needed to see how these clay bodies performed after firing to glaze temperature, Cone 6 or 2190〫 F. After firing, I measured how much they shrunk compared to their original size and I measured how much water they absorbed. The shrinkage was what I expected around 12%, I don’t want it to be more than this. For absorption I first weigh the clay test tiles, then I let them soak in water over night, and weigh them again in the morning. For this first batch it was around 4% absorption but I want it to be a little lower than that. Think about your favorite mug. You run it though the dishwasher and it absorbs water through the foot then you put it in the microwave. Just to be clear I never recommend putting handmade objects in the microwave. The tiny particles of water are trapped in the walls of the mug and they start moving very quickly. They have no where to go causing your favorite mug to crack.
Just a little more technical info to go. A typical clay body has 50% plastics to 50% non-plastics. Plastics being the clay and non-plastics being the flux (the melter) and silica (the glass). In order to reduce the absorption I need to reduce the plastics and increase the non-plastics. Think of it this way the clay is the skeleton that holds the piece in whatever shape it has been molded into. The flux then melts the silica making the piece glass like. If I want the clay body to absorb less water then I need to add more flux and silica to make it a little more glass like or vitrified.
After all of these tests I think I have worked out my new clay body but of course the testing is not done. I have mixed up a two gallon batch of the new recipe and am making a few items in order to glaze. If the clay works as expected then I will make up a large batch and start casting as usual.
There is a lot of information I glossed over here to try and keep it simple. But if you have any questions please feel free to email me. There are also many excellent resources out there and I will start posting those on another page called Links.